
I’ve always wanted to do more with wearable electronics, so when I found myself with some extra time in my life and saw this great example of a dress with LEDs, I had to make one for myself.
I decided to document my process too, in case others were interested in how i did it.
I’ve made a separate blogpost on how to make the galaxy dress I wear over this LED dress.
 |
 |
|---|
I have also documented all my mistakes, or things I would have done differently now I know better, in this blogpost, so you don’t have to make the same mistakes.
But before you already head off to another page, lets make a LED-dress!
To make my dress, I collected the following items:
- An Arduino Lilypad
- A programmer/FDTI (It depends on the Lilypad if you need it, I’ll explain at the the bottom of this post when that will be the case)
- 20 Lilypad wearable LEDs
- One roll of conductive thread (not the yarn)
- A battery (see options at the bottom)
- A slip dress (or under-dress)
- A thin dress as the outer layer
- A needle, to sew the thread on the dress.
- Super glue and or nail polish, to secure the thread and finish of the “rough” edges
I started with making a mock-up of the Lilypad, some conductive thread and one LED. Just to test if any of these would at least work to some degree (which they did, yay!).

I progressed with figuring out where to place the Lilypad. The computer is quite small and light, but it does pull a bit on the thin fabric of the slip dress.
I took into account that I wanted to be able to walk around and move freely, and I also wanted to be able to sit and lean backwards comfortably. I tested multiple locations, while wearing the dress.
(Note that the mock-up stuff is still connected to the Lilypad).
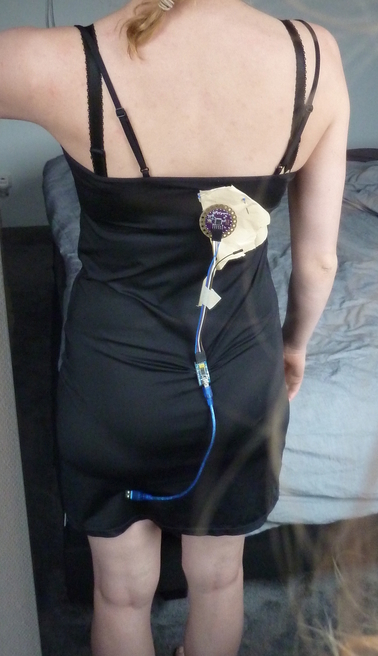
Eventually I decided on sewing the Lilypad on the back. I sewed it, loosely and with breakable thread, to the top border of the dress where it would be secure, but wouldn’t pull down the fabric (the top border is made of more heavy material than the rest of the dress).

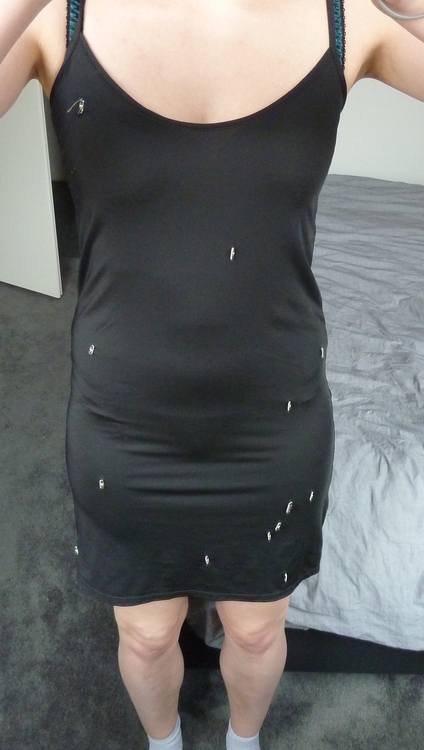
Now the Lilypad had found its place, on the next step, the LEDs! As with the Lilypad, I used myself as a mannequin and secured 10 pins at ‘random’ locations on the dress. I made sure everything that could be covered with a bikini was avoided, so the LEDs wouldn’t sparkle from awkward locations.
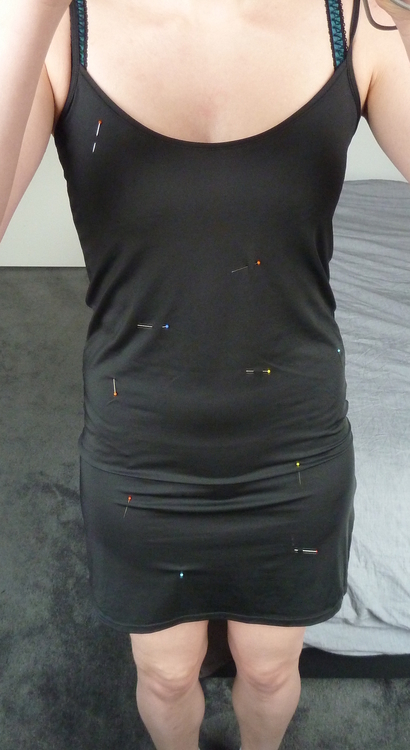
When I felt like all the pins had found a nice place, I added the LEDs and checked one more time if the placement was right.

A friend suggested to add constellations or another, more personal, touch to the dress, I did both and added the constellation of my birth month. I also added a button to be able to click these LEDs on or off (the button is not yet pictured).
Next, I sewed the first LED with conductive thread. I decided that all the LEDs would have their minus side up, and the plus side down. This way I hoped to prevent any accidents with the circuit crossing later on.
Luckily for me, this LED worked, so I did things right! I continued to sew the rest of the LEDs on loosely, with normal black yarn so they wouldn’t fall off when I’d sew the conductive thread (pins weren’t the best way to secure them).
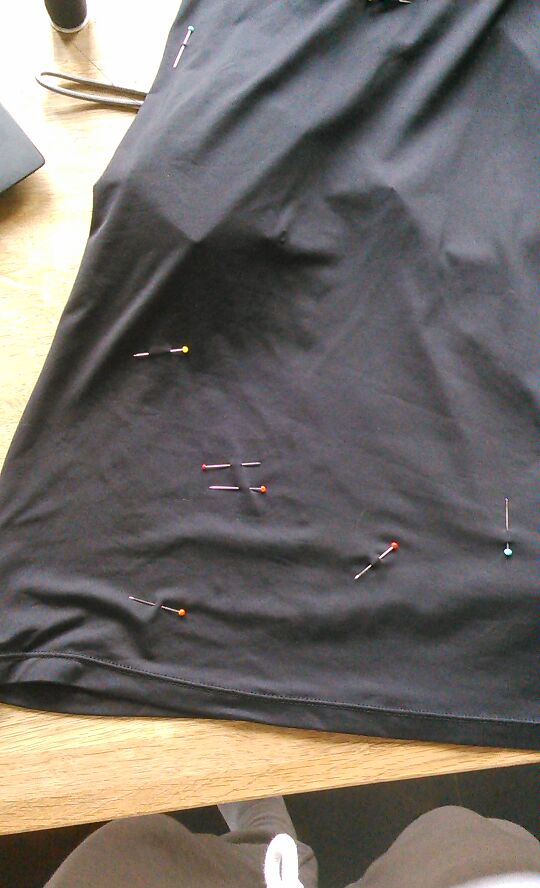
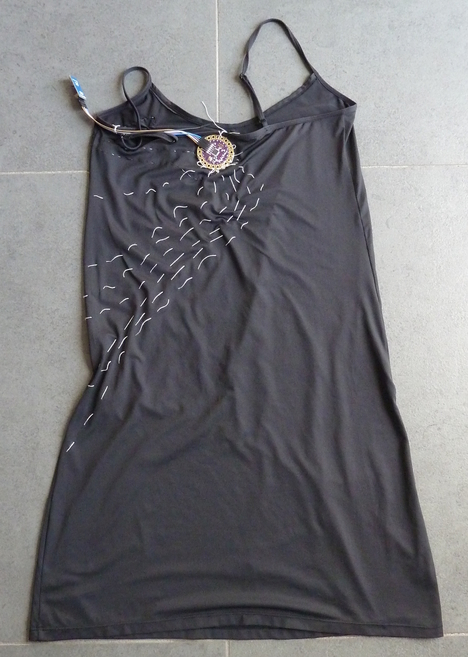
After all the LEDs were in their place, I made a mock-up of where the conducive thread would go, with white, easily breakable, normal yarn. This way I could check if none of the wires would cross and short circuit the electronics. I also made sure to add some extra room between some of them, just to be sure I could still move/sit/tie my shoelaces.
 |
 |
|---|
(Yes, I made a few mistakes and trailed off, but as this was only a mock-up, I let it be).
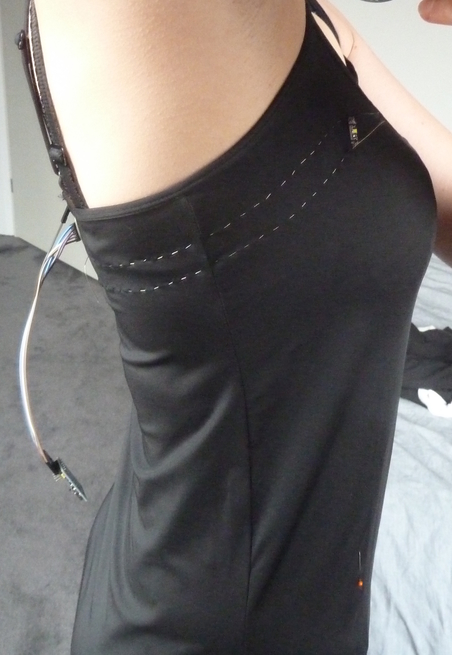
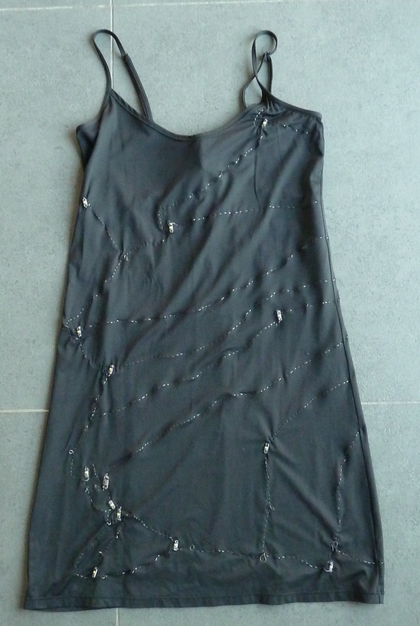
Once I was confident all the wiring would be okay, I hand-sewed the conductive thread from the output pins of the Lilypad to the pluses of the LEDs.
Because the minuses don’t all have to be connected on their own, I waited to sew this part till I was done with all the plus-wires. When I finished all the plus-wires, I went from the minus-output-pin of the Lilypad and went all around from LED to LED till al the minuses were connected to the Lilypad.
If I did everything right, the electronics of the dress should be finished.
 |
 |
|---|
After trying the dress on, I found that the back was boring, that’s why you may notice I have also added some LEDs to the back now.
When the electronics were done, I secured the Lilypad and the LEDs to the dress with normal black yarn. I cut off all the long ends from the conductive thread, to avoid they could tough each other and short circuit, and I put some super glue on the knots to make sure they wouldn’t loosen. To avoid the overdress getting stuck on the edges and knots, I topped everything off with some clear nail polish.
The Lilypad doesn’t know what to do with the LEDs, so it needed to be programmed. In my case, my Lilypad needed a programmer (which is also called a FTDI). I’ve already shown the programmer and its wires on several pictures, but haven’t explained it. The programmer looks like this:
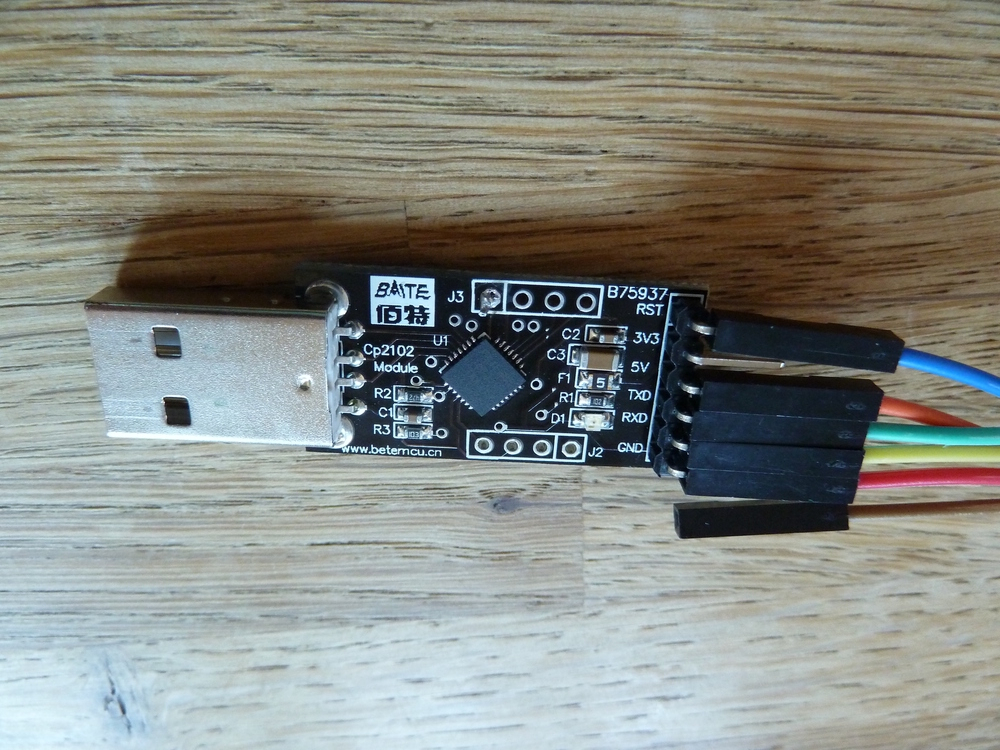
The programmer is kinda like a “translator” between my laptop, which is very complex and powerful, and the tiny, much more simple, chip of the Lilypad. By connecting the programmer to the Lilypad on one end, and my computer on the other end, I was able to upload my code into the Lilypad.

I’ve uploaded my code to Github so you can download it, use it and even make it better. You can, of course, also write your own code.
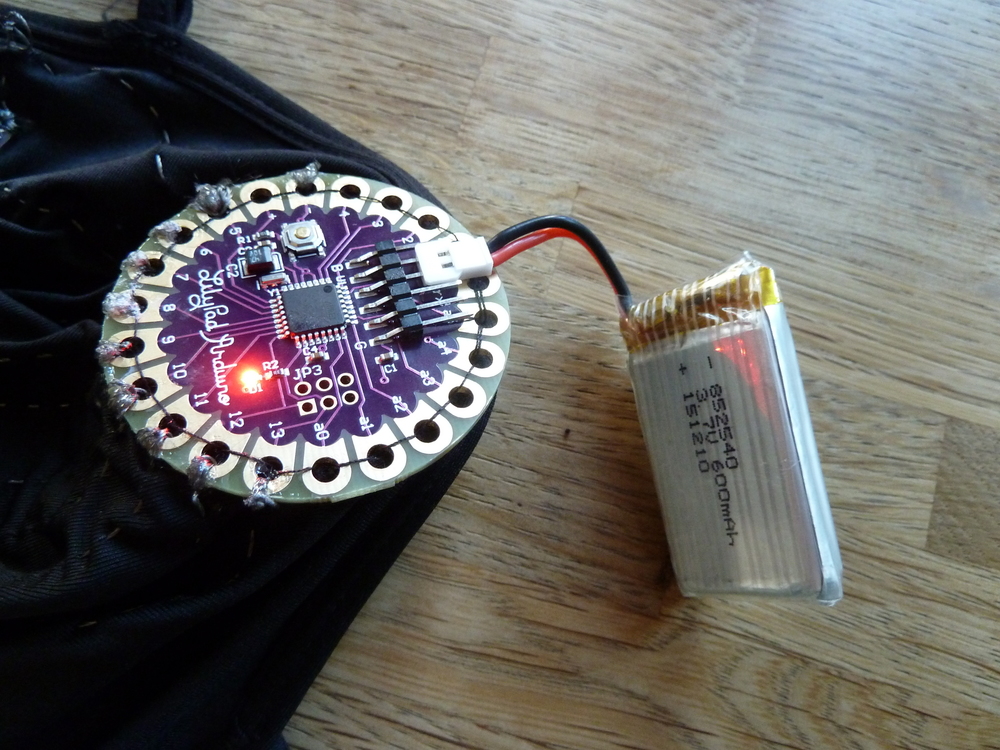
Without a battery the dress wouldn’t be portable, thus I added a battery.
I sewed a tiny pocket on the back of the dress so the battery wouldn’t just wobble around all the time.

And, with this, the LED-dress is done!
If you’re interesting in the technical details, I’ve explained them a bit better over here.
Next project, the Galaxy-overdress.
———————————————————————————–
A few notes for when you’re going shopping:
- The Lilypad:
There are three different Lilypads, all would work well.
I have used the “LilyPad Arduino 328 Main Board” because I could find if for cheap and it has the most output-pins (there are 12 output-pins).
There’s also the the Lilypad Simple board, which has fewer output-pins than the Main board (it has 5), but an on/off switch and a build-in power socket.
As a third option there’s the Lilypad USB board, which has the same number of output-pins as the Lilypad Simple and build-in power socket as well, but also a faster chip and it doesn’t need a separate programmer.
(There are multiple brands of wearable micro controllers, Lilypad is just the one I’m familiar with, but I’m sure the others would work just as well). - The battery:
I’ve used a rechargeable 3.7V lipo “drone” battery, because its nicely thin and was gifted to me for projects like these. This works fine, but I needed to figure out how to connect it to the Lilypad (which wasn’t difficult at all).
Another option is to use a wearable battery holder from the Lilypad brand. or any other - The slip dress:
My slip dress is made of polyester and is silky/smooth to the touch, so it doesn’t creep up under the overdress. - The overdress:
Keep in mind that if the material of the overdress is too thick the LEDs won’t shiny trough (no need to worry about it being see through, you’ll wear a 2nd layer beneath it anyway). - If you want to paint/bleach your overdress, like I did, a cotton dress works best (mine is 97% cotton).